Showing posts with label Recipes: Breakfast. Show all posts

Friday, May 3, 2013

Kulichi (Russian Easter cakes)

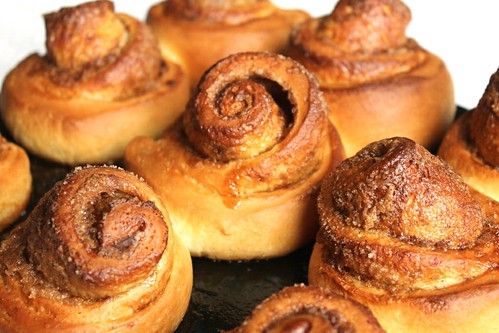
IMG_0006

I rarely go into baking yeast cakes or bread, but sometimes there is definitely room for that in life. Exactly like I do enjoy making my own cakes for Christmas, some years I do like baking my own kulichi for Easter. They are not really labor intensive, but they certainly are time consuming. However there are times when spending a thoughtless half a day around the kitchen making something homey the same as times and times before feels just right. Especially given that proper home made kulichi are incredibly good. None of the bought counterparts will ever get close to them.


In essence kulichi are yeast fruit cakes. What makes them special is their richness - I mean LOTS of butter. They turn out very soft, airy and crumbling. So they are wonderful together with pascha - traditional cheesecake we also make for Easter. However it is not at all necessary. You can easily serve them just with tea or add some plain cream cheese on the side.

I really like adding good vanilla and lemon zest to the dough. So do I like soaking the fruits in rum or brandy. Both are perhaps not traditional, but do add a lot to the flavor. Making kulichi does take some time just because yeast dough needs to rise a couple of times before you bake it. But there is nothing really complicated about the process.

Kulichi (Russian Easter cakes)

makes 4 cakes (around 400 g each)

Kulichi dough:
400 g all purpose flour
125 ml of milk
180 g sugar
10 g (1 packet) of rapid rise yeast
2 egg yolks
1/4 teaspoon salt
zest of one lemon
1 teaspoon vanilla
250 g butter, softened
180 g mixed fruit (some combination of raisins, sultanas, candied cherries, currants, apricots, pineapple and citrus peel)
50 ml rum or brandy

Icing:
200 g icing sugar
juice of 1 - 2 lemons

Soak the fruit in rum or brandy and set aside.

Heat the milk till it's a little warmer then your finger.

Mix half of the milk with yeast and a teaspoon of sugar, cover and leave for 15 minutes. The yeast should start bubbling. Do not skip this step even if your yeast package instructions say you should mix the yeast straight into the flour. As the dough is very rich the yeast needs a little help to activate here.

Combine the rest of the milk with all the remaining sugar, egg yolks, salt, lemon zest and vanilla and stir till most of the sugar dissolves.

Place the flour in a medium bowl. Add the milk mixture and the yeast mixture. By hand or using a dough hook stir everything together until you get even dough.

Knead the dough for 10 minutes by hand or for 5 minutes with a dough hook of electric mixer. Do not skip this step. It is needed to make sure kulichi do not go stale too early.

Cover the dough and let it stand in a warm place till it doubles in size. It should take 30 - 45 minutes. If it's not very warm at your home, use your oven heated to 30C.

Once the dough has risen, add the fruits together with rum or brandy and softened butter. Mix all together. It's much better to use a dough hook of electric mixer here, doing it by hand really takes a lot of effort.

Pans we use for baking kulichi are mug-shaped (tall, cylindrical, approximately 400 ml in volume) - the recipe is enough for four of these. If you can't get them, just use two 9 inch loaf pans lined with baking paper. Or use a muffin pan (small kulichi are very cute too), lined with paper muffin cups.

Fill your pans with dough to 1/3 of their height (not more, the dough will rise a lot). Cover with a towel or cling film and let stand in a warm place till the dough doubles in size.

Preheat the oven to 160C. Once the dough has risen, place kulichi in the oven. If your shapes are around 400 ml each, baking will take around 50 minutes. For a loaf pan it can take longer. For muffin cups it will take around 30 minutes. In any case it is safer to cover the kulichi with foil or baking paper 20 minutes after you start baking to prevent them from burning on the top.

Kulichi are ready when they are dark brown on top and a wooden stick inserted deep in the middle of the cake comes out clean and dry. Take them out of the oven and let cool down in their shapes on a rack.

Once kulichi are cool, take them out of their shapes and decorate them. To make the icing, place the icing sugar in a small bowl. Add enough lemon juice to get thick and creamy paste. Spoon the paste on the kulichi to cover the top. Let the icing set for 15 - 20 minutes.

Serve the kulichi with tea. Pascha cheesecake or plain cream cheese are wonderful complements to them.

Related:

Pascha (Russian Easter cheesecake)
Schneken (German sticky cinnamon buns)
Kovrizhka, grandma's spice cake (vegan version)
Christmas Black cake (Rum cake)

Thursday, May 2, 2013

Pascha (Russian Easter cheesecake)

IMG_0022

This coming Sunday everybody in Moscow is going to celebrate Easter. I was never religious, but Easter for me is a good old family tradition. And above all it's about food. I do not go into egg decorating affair, which is popular around here, but I have to have kulichi and pascha. Kulichi are special yeast fruit cakes and pascha is a kind of dense cold cheesecake. Together they produce a wonderful festive breakfast. Pascha tastes very fresh and complements the warm soft cake as a delicious spread. I do not bake my own kulichi every year, but pascha I always make myself. I do think it deserves to be made more often than once a year. It only takes half an hour but tastes really special.

Tuesday, April 9, 2013

Turkish baked halva (sicak helva)


Before I came to Istanbul I heard about sicak helva - a kind of custard made of crushed tahini halva mixed with cream and baked. The dessert is traditionally eaten after a fish main as it removes fish aftertaste completely. The idea really resonated with me, so the evening we did visit a fish restaurant I was more concerned about my dessert than about my fish main. I ended up loving it and cooking it at home. It turned out to be very practical in Moscow, as tahini halva is very common around here.

Saturday, January 5, 2013

Schnecken (German sticky cinnamon buns)

IMG_9341

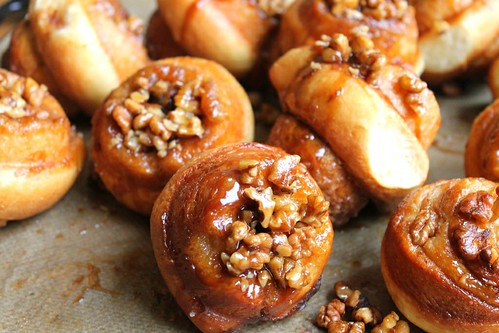
I remember saying something about baklava just recently. Forget. These sticky cinnamon buns are the most powerful piece of anti stress baking (and eating) I ever tried. They might well be the best piece of pastry I ever produced. You will smell the nuts bubbling in sticky maple syrup and all the sweet cinnamon richness, while watching how the spiral buns puff out of their cases, catching each others' sides and crisping up on top. Twenty minutes later that one of them looking right at you will be just yours. And so will be the maple nutty goo left over at the bottom of the baking dish (which is, as often happens in life, the best part of the exercise).


Getting a little more serious, I have to say I'm very uncomfortable dealing with yeast. On top of that I was extremely sad that morning, so there was not much hope that the idea of baking will at all work. But it just wouldn't get out of my mind. I was reading the Domestic Goddess couple of days before and got fascinated by the idea of schnecken. These are German / Jewish cinnamon roll buns and the thing is that they are cooked in a muffin pan, each in its individual case filled with soft rich and gooey maple caramel.


Somehow everything worked magically. And it didn't even take long. The dough is easily mixed in the processor or by hand. It rose extremely well and fast. Rolling and slicing felt easy and comfortable. And that sticky maple caramel I wouldn't mind making every day, so pleasurable it was.

I didn't even consider "cooling them down" as Nigella suggested in her recipe and had one right out of the oven. At least most of the cookies I make always taste very special when they have just been baked. So did the schnecken. My mom, dad and brother entered the house an hour or two later and they didn't even notice how they instantly found their way straight to the kitchen. They looked so genuinely happy once they had a taste. Those few buns which were left over at the table the next morning still tasted wonderful, but talking about longer storage here is perhaps irrelevant.


However easy and enjoyable the process is, it is still yeast dough and it will take you no less than 1.5 - 2 hours. This is more relevant for the relaxed weekend than for a busy afterwork cooking. Another thing to mention is about authenticity. I've no idea what the traditional German schnecken taste like. Knowing Nigella's approach, these may well deviate from the classics (perhaps in the direction of cooking simplicity, but never compromising on the taste).

The recipe calls for things like maple syrup, corn syrup, brown sugar etc. In Moscow they used to be hard to find, but luckily not any more. There are several online stores selling them. The one I use most often is here, though I'm not ready to argue it is the best one. I do think maple syrup and corn syrup are worth getting. What they produce is so gorgeous that even if you never used them before you are likely to find yourself doing it more and more once you start.

Schnecken (German / Jewish sticky cinnamon buns) (recipe adapted from How to be a domestic goddess by Nigella Lawson)

makes 12

Dough:
420 g (3 1/3 cups) all purpose flour
40 g (3 tablespoons) white sugar
1/2 teaspoon salt
11 g (1 packet) of rapid rise yeast
80 g (1/3 cup) unsalted butter
150 g (1/2 cup plus 2 tablespoons) milk, around 3.5% fat
2 eggs

Maple caramel:
130 g (1/2 cup plus 1 tablespoon) unsalted butter, softened
25 g (2 tablespoons) demerara or turbinado brown sugar
60 g (4 tablespoons) maple syrup
45 g (3 tablespoons) light corn syrup
150 g (1 cup) walnuts or pecans, roughly chopped

Glaze:
1 egg
2 table spoons milk, around 3.5% fat

Filling:
40 g (3 tablespoons) white sugar
100 g (1/2 cup) demerara or turbinado brown sugar
1 tablespoon ground cinnamon

To bake you will need a 12-cup steel muffin pan, buttered

In a medium bowl or in a standing mixer bowl combine the dry ingredients of the dough (flour, sugar, salt and yeast) and give them a quick stir. Melt the butter in the milk (do not overheat, it shouldn't boil, should feel warm when touched with your finger). Beat the eggs into the milk and butter mixture. Pour the wet ingredients into the dry. Knead for 10 minutes with your hands or for 5 minutes with a standing mixer dough hook.

Now, that's important that you do knead it. Not till everything is combined and looks like dough, but for the requested 10 minutes. Just relax over this activity. It's very pleasurable actually.

Put the dough in a slightly oiled bowl, turn to coat, cover with a plastic wrap and leave to rise in a warm place. It should about double in size. The process can take from 30 minutes to slightly over an hour. By "warm" place I mean something around 28-30C with no draught. In my house it is substantially colder in the winter, so I live the dough to rise in the oven preheated to 25-30C. If you go this way, be careful not to overheat the dough. It might be helpful to wrap the bowl with your dough in a large towel or blanket to stabilize its temperature.

While the dough is rising, make the maple caramel. Beat the brown sugar into the butter. Beat in maple syrup and corn syrup. Mix in the nuts.

Divide the mixture among the muffin cups.

Once the dough has risen, knock it back. Knead once or twice and roll into a rectangle around 30 by 60 cm (12 by 24 inches). It was easy to work with and didn't stick, so I didn't flour my working surface and roller. However if you feel it's needed, do.

Make the glaze by whisking an egg with two tablespoons of milk. Brush the dough with the glaze (you will probably need less than all of the glaze - just set the rest aside).

Make the filling by mixing together white and brown sugar and cinnamon. Sprinkle the filling over the glazed dough.

Starting from the longer side, roll the dough. Try to keep the roll a firm cylinder.

Cut the roll into 12 slices and place each slice into an individual muffin cup on top of maple caramel.

Cover the buns with plastic wrap and leave in a warm place to rise once again. This will take around 20 - 30 minutes.

Once they increased in size and became puffy, remove the plastic wrap and stick them in the 175C oven. It is better to place the muffin pan on a baking sheet covered with foil (some of the caramel may leak during the baking). If you were using your oven to create the "warm place", take the buns out and cover with a towel to prevent them from cooling. Switch the oven to 175C and stick the buns back only once the oven it fully preheated to the requested temperature. Bake for 20 - 25 minutes, till the buns rise well, get golden and crisp on top (see the picture above). Take out of the oven.

While they are still very hot, you will need to invert them onto a baking sheet covered with baking paper. The best way is to cover the muffin pan with the baking paper, than with inverted baking sheet. Than turn the whole thing upside down, being careful not to burn your hands. Put the nuts which got stuck in the muffin pan back on the buns (or use them differently, if you know what I mean).

They were perfect right out of the oven. So they were after cooling down to room temperature. Once cool, they are better stored covered with a plastic wrap or in an airtight container. Should you need to store them longer than 1-2 days, I guess fridge would be the best decision.

Related:

Baklava
Chocolate fondant Sticky toffee pudding
Spicy hot cake with sticky toffee sauce
Banana upside down mini cakes (vegan version)
Cinnamon roll cookies
Brownies with cream cheese topping (video)
Ginger bread house 

Sunday, October 21, 2012

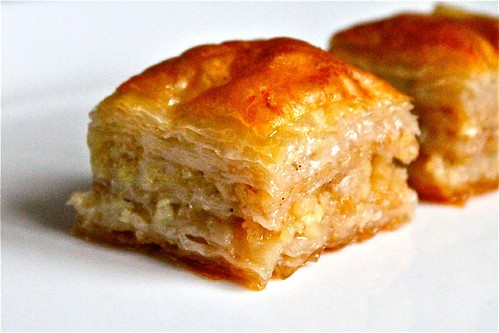
Baklava


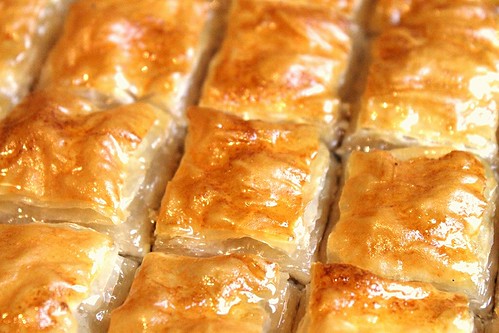
It seems that I found something strong enough to heal a broken heart, which is almost magic. I only made baklava a couple of times and I'm not going to pretend I know everything about it. There are people who learn to make baklava throughout their lives and hopefully I'll once have good talk with one of them. But right now I can say for sure that you can make it very well from the very first attempt and enjoy both the making and the eating just extremely.

Friday, October 5, 2012

Carrot halwa


Carrot halwa was the first Indian dessert I got to try. Since then I tried many more, but it remained my favorite (not sure whether it is a coincidence). It is something comforting, warm and sweet. Something rich and mild. Something I'd never expect from the carrot. Like in English carrot cake it works in some magical way here.

Thursday, July 19, 2012

Babbo's eggs (poached in tomato sauce)

IMG_5521

I love poached eggs overall, but this particular Italian way of making and serving them was a great finding for me. I learned it in London from Katie Caldesi and since then I keep making it as a breakfast, appetizer, light lunch or dinner. Somehow the tomato sauce complements the egg really well and brings is up to a balanced meal. Moreover, poaching an egg in tomato sauce doesn't involve any stress associated with poaching eggs in water.

Thursday, June 21, 2012

Sweet vareniki (Ukrainian dumpling) with cherries or with cottage cheese

IMG_4712

We came back from Kiev right when the fresh cherries started actively selling at our nearby market. So we made our beloved vareniki with cherries, that we didn't do for many years. In the process the venture extended to also include cottage cheese vareniki. I'll never be able to tell which one of these two sweet vareniki versions is better. It is not like with savory vareniki, where mashed potato is my absolute first choice.

Tuesday, May 29, 2012

Home made strawberry jam (varenie)


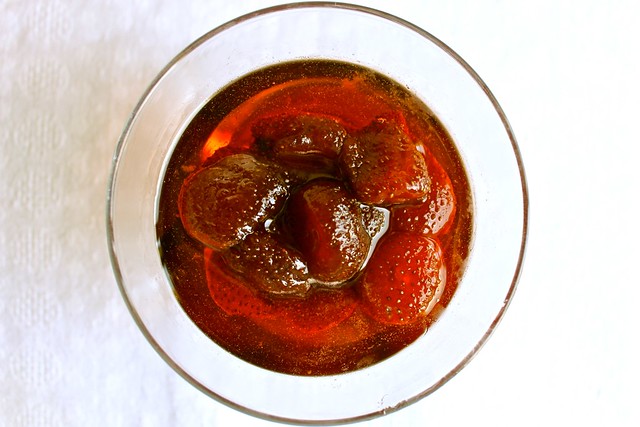
For the second week already Moscow markets are full of strawberries. These are the first summer strawberries from Krasnodar region. Farmers are saying that this year they had record +35C temperatures in May and the strawberries came very early. They smell of summer and of my childhood. I just finished making the first portion (around 4 kg) of jam (varenie) and it feels like it is just the beginning.

Monday, May 21, 2012

Aidina's carrot cake for my granny


I happen to love carrot cake. From American style cakes this one is my favorite. For a long time I kept trying it in Moscow bakeries and I have to say I do like it almost everywhere. I figured out what an ideal carrot cake for me would taste like though. I love when the cake itself is very moist. It easily crumbles and I can recognize coarsely chopped crunchy walnuts. The cream cheese frosting tastes strongly of cheese and is even a little salty. And now, thanks to my beautiful friend Aidina I can make it at home.

Saturday, April 28, 2012

Mozzarella di bufala Campana, Kalamata oil and bruschetta

IMG_3934

I'm still wondering how I deserved it, but yesterday two completely amazing products came into my hands. From the first contact I felt so much respect that I actually didn't dare to touch them till the next morning. I really wanted to try them with a clear taste. You might think I'm going crazy, but I'm now so happy I was alone when I tried them. I'd never enjoy in full if anybody at all was watching me.

Monday, April 23, 2012

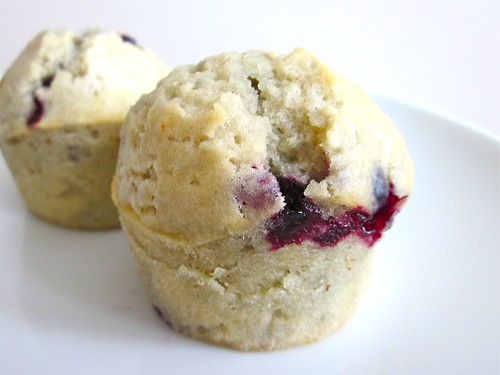
Blackcurrant vanilla muffins (vegan version)

8426839378_70b7c28ee9_o

This recipe survived in my kitchen for a year and I thought it really is worth sharing. These are the simplest muffins from what I bake. After lots of trials with other muffin flavors I have to say they also taste the best to me. They are something I don't forget and keep coming back to, like these oatmeal cookies and this banana bread.

Thursday, March 8, 2012

Potato zrazy with mushrooms

IMG_2915

These potato zrazy are another take from my grand grandmother's collection. I make them really rarely, because it is time consuming. Something has to force me and this time it was a Russian / Ukrainian cooking class I was preparing to give to a group of German ladies. My granny stuffed the zrazy with minced meat, but I prefer mushrooms especially given that it is Lent now.

Friday, February 24, 2012

Sticky toffee pudding


Couple of weeks ago I entered a phase of heavy craving for dates. It's hard to explain, but I just can't help eating them. Some days - for breakfast, lunch and dinner. Weird, but those dates which look the most messy and jammed, as if a bear stepped on them, seem to be the tastiest. Anyhow, that day I woke up determined to make a proper sticky toffee pudding - soft and moist with gooey butterscotch sauce and melting ice-cream on top. Another idea was to give a class at Pinch about it, it didn't work. But the pudding itself! I can't find words strong enough to describe its beauty.

Monday, February 20, 2012

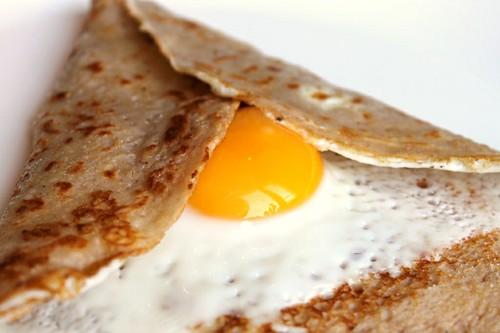
Buckwheat galette with an egg

IMG_2489

This galette is one of addictions I got while living in Fontainebleau. At first I had certain trouble eating French there with my vegetarian preferences. So very fast I switched from bistrots (common casual dining French restaurants, which were mainly meat dominated) to creperies. These were a true paradise with their menus filled with both sweet white crepes and savory buckwheat galettes. The galette with an egg was apparently the most sexy and always managed to beat everything else.

Wednesday, February 15, 2012

Kovrizhka, grandma's spice cake (vegan version)


I was thinking about the menu for a Russian food cooking class and this kovrizhka came to mind. Kovrizhka is a kind of spice cake, baked in Russia and Ukraine, which I loved to make when I was in my teens. Since then I somehow forgot about it, which is unjustified given how tasty and simple it is. It fit really well into the class menu, so I went to search for the recipe.

Monday, January 23, 2012

Lazy vareniki (cottage cheese gnocchi)

IMG_2102 

Just in case you were looking for a recipe to turn your kitchen into a real mess, I've got one for you. Trust me. It works. Lazy veryniki come out great from your very first attempt. They make an amazing breakfast, lunch or snack or even dinner. We kept making them for as long for as I remember myself. However, though I normally succeed in cooking clean, lazy veryniki always leave me with a mess at the kitchen. If you solve this - my respect.

Wednesday, January 11, 2012

Spanish hot chocolate


Our first meeting in Pinch of Cinnamon club was about making churros with Spanish hot chocolate and I was just amazed how good a topic these two were for a short and friendly cooking class. All this chocolate melting, piping out pastry, deep frying and then (very important!) eating is just a lovely little feast. So if you are in search for interactive cooking ideas, consider this one.


I already explained making churros in detail, so now is the turn of Spanish hot chocolate. While churros do take some time to make, the chocolate can hardly take more than 15 minutes. Unlike the French and Italian versions of this drink, Spanish chocolate in normally thickened a little by corn starch. So first you make something like milk kissel and then you add chopped chocolate and mix it in as it melts.

Spanish hot chocolate (vegan version possible)

serves 6

1 liter of milk (substitute for soya milk to make the vegan version)
2-4 table spoons corn starch (depending on how thick you prefer the chocolate)
3 table spoons sugar (or to your taste)
200 g bitter sweet chocolate, 70-75% coco (chopped)

In a small bowl combine the corn starch with 50 ml of cold milk. Pour the rest of the milk into a medium pan, add the sugar and bring to the boil. Take off the heat, pour in the corn starch while whisking. Return to low heat and bring to boil. The milk should thicken a little.

Take off the heat and add the chocolate. Wait for 30 seconds (this will let the chocolate melt), then whisk together till you get a smooth glossy chocolate.

Serve the chocolate hot or warm. To me it is most convenient to eat (with a teaspoon) rather then drink. It is a perfect pair for churros.

Related:

Spanish churros
A magic cup of cinnamon hot chocolate


Spanish churros

Have I said already how much I love churros with hot chocolate? I first tried them in Barcelona at a Christmas fair. I was standing there on the snowy Gran Via de les Corts Catalanes holding a paper cone of long hot and crispy sugary doughnuts in one hand and a plastic cup of thick dark majic in the other hand... and had no spare hand whatsoever.

Saturday, January 7, 2012

Everyday banana bread (vegan version)


I was not going to make this post because it's a little bit like posting the fried eggs you normally make yourself for breakfast. However some of my friends got interested, so I thought why not. It's not the first time that I see the simplest things getting way more resonance than something more sophisticated. After all this breakfast or snack food adds so much pleasure to your everyday life.